
Most “Amazon FBA for beginners” guides skip the part where things actually go wrong. They walk you through account setup, then jump straight to “find a winning product” like that’s a five-minute task. It isn’t, and pretending otherwise is how new sellers burn through $5,000-$10,000 before they ship a single unit.
This checklist is the version we wish more people had before they started. It won’t tell you FBA is easy or guaranteed. It will tell you exactly what to check, in what order, before you commit real money to your first product.
What you need before you start
Before you touch product research, get three things in place. First, a business entity or at minimum a clear plan to register one. Amazon doesn’t require an LLC to sell, but banks, suppliers, and tax authorities will eventually ask for one, and retrofitting a business structure after you’ve already got inventory moving is a headache you can avoid.
Second, a realistic budget. We’d recommend starting with at least $3,000-$5,000 in available capital for your first product, covering inventory, Amazon’s referral and FBA fees, and a basic PPC budget for launch. If that number makes you uncomfortable, that’s useful information: it means you should either lower your first order quantity or wait until you have more runway.
Third, patience for a research phase that takes longer than people expect. Sellers who rush from “I want to sell on Amazon” to “I ordered 500 units” in under two weeks are the ones who end up with dead stock. Give yourself 3-4 weeks minimum to validate a product idea before you wire money to a supplier.
Step 1: Decide if FBA is actually the right model for you
Amazon FBA means you send inventory to Amazon’s warehouses, and Amazon handles storage, packing, shipping, and customer service for those orders. In exchange, you pay fulfillment fees and monthly storage fees. This is different from FBM (Fulfilled by Merchant), where you ship orders yourself, and different from wholesale or dropshipping models that don’t involve owning a private label brand.
FBA works well if you want to build a brand with your own SKUs, you’re comfortable holding inventory upfront, and you want Prime eligibility without building your own logistics network. It works less well if you have very limited capital, because inventory ties up cash for weeks before it converts to sales, or if your product is oversized, fragile, or has thin margins that FBA fees would eat entirely.
Run the math before you commit. Take your target retail price, subtract Amazon’s referral fee (typically 8-15% depending on category), subtract the FBA fulfillment fee for your product’s size tier, subtract landed cost per unit, and see what’s left. If your margin after all fees is under 20%, that product is a hard sell as a first FBA launch.
Step 2: Set your budget honestly, not optimistically
New sellers routinely underestimate two costs: PPC spend during launch and the gap between “product landed” and “product actually selling well.” Budget for at least 60-90 days of runway where your product might not be profitable yet, because you’re still building reviews and ranking.
A basic breakdown for a first product often looks like this: 40-50% of your budget on first inventory order, 15-20% on Amazon PPC for the first two to three months, 10% on photography and listing content, and the rest held as buffer for reorders or unexpected fees. If your total available capital is under $3,000, consider a smaller test batch (100-200 units) rather than skipping straight to a full-size order.
One thing we always tell new sellers: don’t spend your entire budget on inventory. A seller who orders 1,000 units and has nothing left for ads or a listing photographer is stuck. A seller who orders 300 units, launches with a decent listing, and runs PPC for 60 days has a much better shot at actually validating whether the product works.
Step 3: Research your first product category the right way
This is the step most beginner guides gloss over, and it’s the one that determines whether your business survives past month six. Good product research isn’t “what’s trending on TikTok.” It’s checking demand, competition, and margin math together, for a specific product, in a specific category.
Start with search volume. Tools like Helium 10 or Jungle Scout will show you monthly search volume for keywords related to your product idea. You want a category with meaningful search demand, generally a few thousand monthly searches for your core keyword, without being dominated by one or two brands that own 60%+ of the reviews.
Then check the review count on page one listings. If most top listings have under 500 reviews, that’s a category with room for a new entrant. If every top-10 listing has 5,000+ reviews and a brand name you recognize, that’s a much harder market to break into as a first product. We’ve written a longer breakdown of this process on the Zonpal product research guide, worth reading before you settle on a niche.
Step 4: Register your Amazon seller account correctly
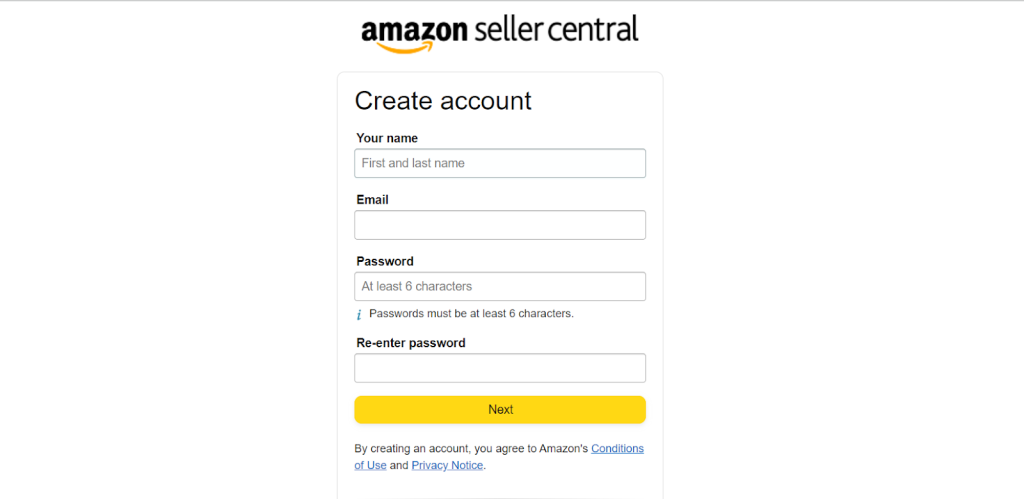
Go to Seller Central and choose the Professional selling plan if you’re planning to sell more than 40 units a month, which almost every FBA private label seller does. The Individual plan waives the $39.99 monthly fee but charges $0.99 per item sold and blocks access to advertising and several seller tools you’ll need.
You’ll need a government ID, a bank account for payouts, a credit card for fees, and tax information (a W-9 for US sellers, W-8BEN for non-US sellers). Amazon’s verification process can take anywhere from a few days to a few weeks depending on how quickly you submit clean documentation, so don’t leave this until after your inventory has already shipped.
A note for sellers based outside the US selling into the US market: get your entity and tax setup right from day one. Retrofitting this after your account is live and generating sales creates unnecessary risk of account holds during verification reviews.
Step 5: Validate demand before you place a supplier order
Before you wire a deposit to any supplier, validate that your product idea has real demand beyond what a keyword tool shows on paper. Look at actual customer reviews on competing listings, specifically the 3-star and 4-star reviews, since those tell you what’s almost good but not quite. That’s your opening for a better product.
Check seasonality too. A tool showing “5,000 monthly searches” might be hiding the fact that 80% of that volume happens in November and December. If you’re launching a seasonal product outside its peak window, your first few months of sales data will look worse than the product’s real potential, which can lead you to kill a good idea too early.
We’d also recommend ordering a physical sample from at least two to three suppliers before committing to a production run. Photos on Alibaba rarely tell the full story on material quality, and a $50-100 sample cost is nothing compared to discovering a quality issue after 500 units have already shipped.
Step 6: Understand FBA fees before you commit to a price point
Amazon’s fee structure has more moving parts than most beginners expect: referral fees, FBA fulfillment fees based on size and weight tier, monthly storage fees, and potential long-term storage fees if inventory sits for more than 365 days. Run every product idea through Amazon’s FBA revenue calculator before you finalize pricing, not after.
Pay close attention to size tier. A product that’s technically small but slightly over the dimensional threshold for “standard” can get bumped into “oversize” pricing, which changes your fulfillment cost dramatically. We’ve seen sellers redesign packaging specifically to stay under a size threshold and save 30-40% on fulfillment fees per unit as a result.
Also factor in storage costs if you’re launching ahead of Q4. Storage fees spike from October through December, so if your product sits in a warehouse through that window without selling, your margin erodes fast. This is one more reason validating demand early (Step 5) matters more than most beginners assume.
Common mistakes beginners make (and how to avoid them)
These show up in almost every new seller account we’ve reviewed, across categories:
- Ordering too much inventory on the first run. A smaller test batch of 150-300 units limits downside if the product doesn’t perform as expected.
- Skipping trademark registration. Without Brand Registry, you lose access to A+ Content, brand analytics, and protection against hijackers. Apply for a trademark before you launch, not after a competitor copies your listing.
- Choosing a product based on personal interest rather than data. Loving a niche doesn’t mean there’s search demand or acceptable margin in it.
- Underpricing to “compete.” New sellers often price below competitors assuming it’ll win sales. It usually just signals lower quality and erodes margin you need for ads.
- Not budgeting for PPC. Organic ranking on a new listing without any advertising support is slow. Most successful launches run PPC aggressively for the first 60-90 days.
Wrapping up
Amazon FBA for beginners isn’t complicated conceptually: source a product, list it well, get it found, keep customers happy. The complexity is in the details, fee math, category selection, and demand validation, that determine whether your first product actually turns a profit.
Work through this checklist in order rather than jumping straight to sourcing. Every step you skip now tends to show up later as a costly mistake, usually after you’ve already committed capital you can’t easily recover.
If you’re at the point where you’ve got a few product ideas but aren’t sure which one actually has the demand and margin to work, that’s exactly where a structured research process makes the difference. Our team can walk through Amazon product research with you and help you validate before you spend on inventory.